火鸟门户系统在线安装教程
火鸟门户系统版本
火鸟门户网站系统 V5.9
服务器配置推荐
CPU:4核
内存:8GB
带宽:5MB
系统盘:40GB
数据盘:100GB
系统:CentOS 8.2
网站环境要求
LINUX服务器面板获取网址 https://www.bt.cn/
宝塔面板 7.5.1
Nginx 1.18 或者 Apache 2.4.41
PHP 7.4
MYSQL 5.7
使用到的软件
应用软件获取网址 https://pc.qq.com/
FileZilla v3.5
Google Chrome v88
Xshell 7
免费SSL证书提供商
华为云
https://console.huaweicloud.com/ccm/?locale=zh-cn#/scs/purchase

阿里云
https://www.aliyun.com/product/cas?spm=5176.19720258.J_8058803260.70.e9392c4aHQLO6Y
安装开始第一步,Xshell 链接服务器,如果服务器为新购服务器,磁盘需要挂载。
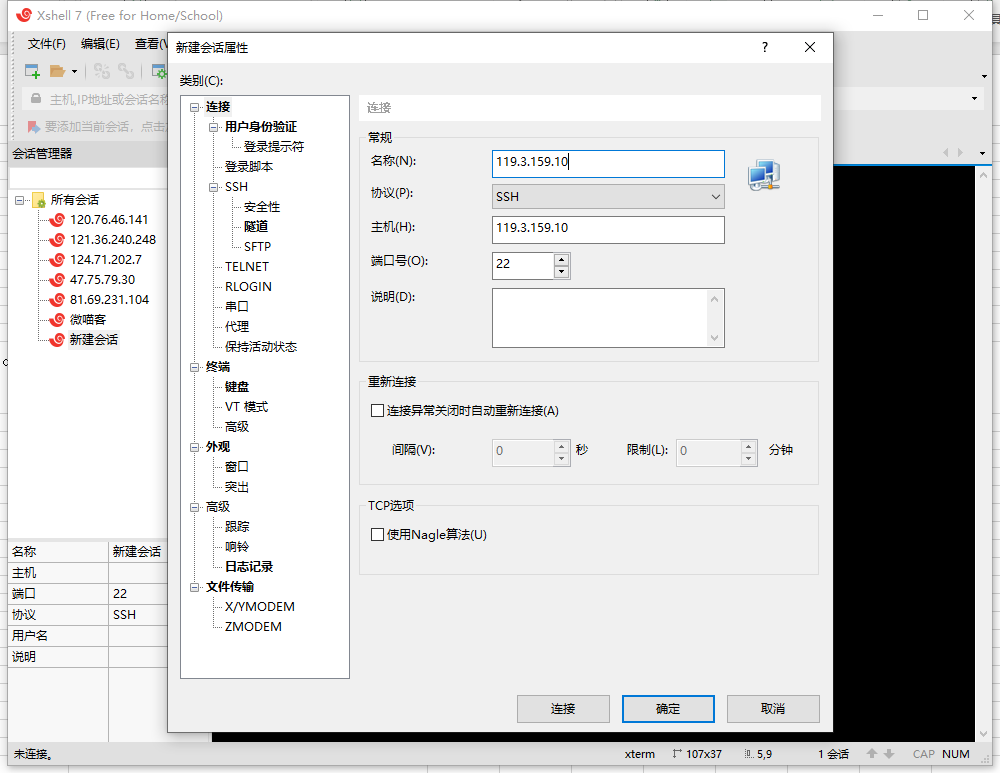
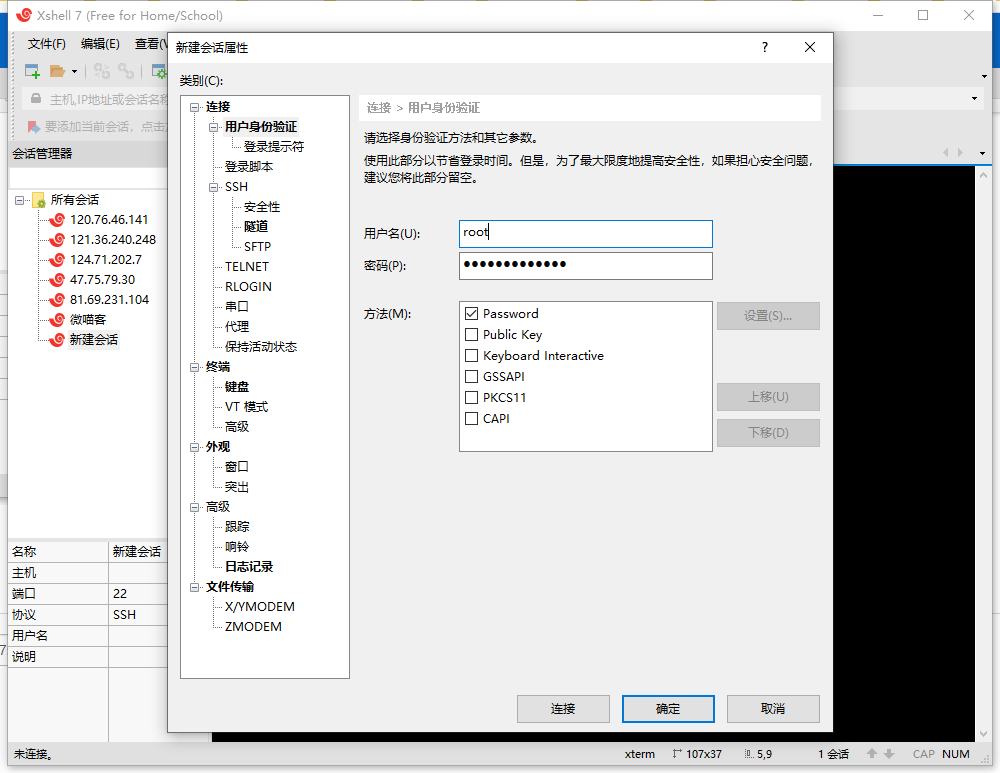
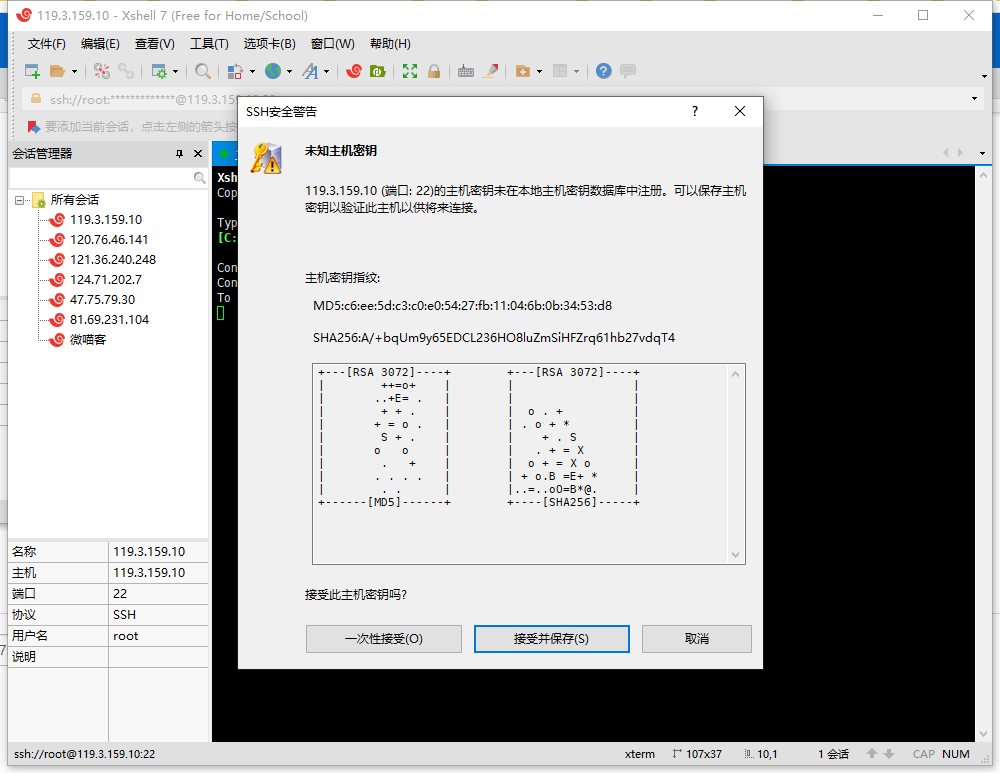

我们有一块100G数据磁盘,看一下服务器磁盘使用状况
[root@hecs-x-xlarge-2-linux-20210303103246 ~]# df -vh
Filesystem      Size  Used Avail Use% Mounted on
devtmpfs        3.8G     0  3.8G   0% /dev
tmpfs           3.8G     0  3.8G   0% /dev/shm
tmpfs           3.8G  8.5M  3.8G   1% /run
tmpfs           3.8G     0  3.8G   0% /sys/fs/cgroup
/dev/vda1        40G  2.3G   35G   7% /
tmpfs           777M     0  777M   0% /run/user/0
查看一下系统所有分区
[root@hecs-x-xlarge-2-linux-20210303103246 ~]# fdisk -l
Disk /dev/vda: 40 GiB, 42949672960 bytes, 83886080 sectors
Units: sectors of 1 * 512 = 512 bytes
Sector size (logical/physical): 512 bytes / 512 bytes
I/O size (minimum/optimal): 512 bytes / 512 bytes
Disklabel type: dos
Disk identifier: 0x5d6e4b6b

Device     Boot Start      End  Sectors Size Id Type
/dev/vda1  *     2048 83886079 83884032  40G 83 Linux


Disk /dev/vdb: 100 GiB, 107374182400 bytes, 209715200 sectors
Units: sectors of 1 * 512 = 512 bytes
Sector size (logical/physical): 512 bytes / 512 bytes
I/O size (minimum/optimal): 512 bytes / 512 bytes
格式化
[root@hecs-x-xlarge-2-linux-20210303103246 ~]# mkfs.ext3 /dev/vdb
mke2fs 1.45.6 (20-Mar-2020)
Creating filesystem with 26214400 4k blocks and 6553600 inodes
Filesystem UUID: 2dfa95ad-0575-474a-8b4a-0f27e7909db8
Superblock backups stored on blocks:
	32768, 98304, 163840, 229376, 294912, 819200, 884736, 1605632, 2654208,
	4096000, 7962624, 11239424, 20480000, 23887872

Allocating group tables: done
Writing inode tables: done
Creating journal (131072 blocks): done
Writing superblocks and filesystem accounting information: done
创建目录,给权限,并挂载
[root@hecs-x-xlarge-2-linux-20210303103246 ~]# mkdir /www
[root@hecs-x-xlarge-2-linux-20210303103246 ~]# chmod -R 777 /www
[root@hecs-x-xlarge-2-linux-20210303103246 ~]# mount /dev/vdb /www
[root@hecs-x-xlarge-2-linux-20210303103246 ~]# df -lh
Filesystem      Size  Used Avail Use% Mounted on
devtmpfs        3.8G     0  3.8G   0% /dev
tmpfs           3.8G     0  3.8G   0% /dev/shm
tmpfs           3.8G  8.5M  3.8G   1% /run
tmpfs           3.8G     0  3.8G   0% /sys/fs/cgroup
/dev/vda1        40G  2.3G   35G   7% /
tmpfs           777M     0  777M   0% /run/user/0
/dev/vdb         98G   61M   93G   1% /www
[root@hecs-x-xlarge-2-linux-20210303103246 ~]#
添加启动项,并重起服务器
[root@hecs-x-xlarge-2-linux-20210303103246 ~]# echo /dev/vdb /www ext3 defaults 0 0 >> /etc/fstab
[root@hecs-x-xlarge-2-linux-20210303103246 ~]# init 6
Connection closing...Socket close.

Connection closed by foreign host.

Disconnected from remote host(119.3.159.10) at 14:05:40.

Type `help' to learn how to use Xshell prompt.
[C:\~]$
服务器重起后,链接服务器,查看是否挂载成功,需要检查一下挂载状态
Connecting to 119.3.159.10:22...
Connection established.
To escape to local shell, press 'Ctrl+Alt+]'.

WARNING! The remote SSH server rejected X11 forwarding request.

	Welcome to Huawei Cloud Service

Last login: Wed Mar  3 13:54:13 2021 from 49.72.19.35
[root@hecs-x-xlarge-2-linux-20210303103246 ~]# df -lh
Filesystem      Size  Used Avail Use% Mounted on
devtmpfs        3.8G     0  3.8G   0% /dev
tmpfs           3.8G     0  3.8G   0% /dev/shm
tmpfs           3.8G  8.5M  3.8G   1% /run
tmpfs           3.8G     0  3.8G   0% /sys/fs/cgroup
/dev/vda1        40G  2.3G   35G   6% /
/dev/vdb         98G   61M   93G   1% /www
tmpfs           777M     0  777M   0% /run/user/0
[root@hecs-x-xlarge-2-linux-20210303103246 ~]#
安装linux服务器面板,进入bt.cn网站,找到Linux面板安装页面,复制安装代码,粘贴到控制台,官方提供三个节点,江苏、香港、 美国,根据服务器归属地选择安装节点。
yum install -y wget && wget -O install.sh http://download.bt.cn/install/install_6.0.sh && sh install.sh
出现提示,输入y
[root@hecs-x-xlarge-2-linux-20210303103246 ~]# yum install -y wget && wget -O install.sh http://download.bt.cn/install/install_6.0.sh && sh install.sh
Last metadata expiration check: 2:47:23 ago on Wed 03 Mar 2021 11:21:44 AM CST.
Package wget-1.19.5-10.el8.x86_64 is already installed.
Dependencies resolved.
Nothing to do.
Complete!
--2021-03-03 14:09:07--  http://download.bt.cn/install/install_6.0.sh
Resolving download.bt.cn (download.bt.cn)... 183.235.223.101, 240e:ff:9000:1100:0:3:0:36
Connecting to download.bt.cn (download.bt.cn)|183.235.223.101|:80... connected.
HTTP request sent, awaiting response... 200 OK
Length: 25386 (25K) [application/octet-stream]
Saving to: ‘install.sh’

install.sh                 100%[=======================================>]  24.79K  --.-KB/s    in 0.04s

2021-03-03 14:09:07 (570 KB/s) - ‘install.sh’ saved [25386/25386]


+----------------------------------------------------------------------
| Bt-WebPanel FOR CentOS/Ubuntu/Debian
+----------------------------------------------------------------------
| Copyright © 2015-2099 BT-SOFT(http://www.bt.cn) All rights reserved.
+----------------------------------------------------------------------
| The WebPanel URL will be http://SERVER_IP:8888 when installed.
+----------------------------------------------------------------------

Do you want to install Bt-Panel to the /www directory now?(y/n): y
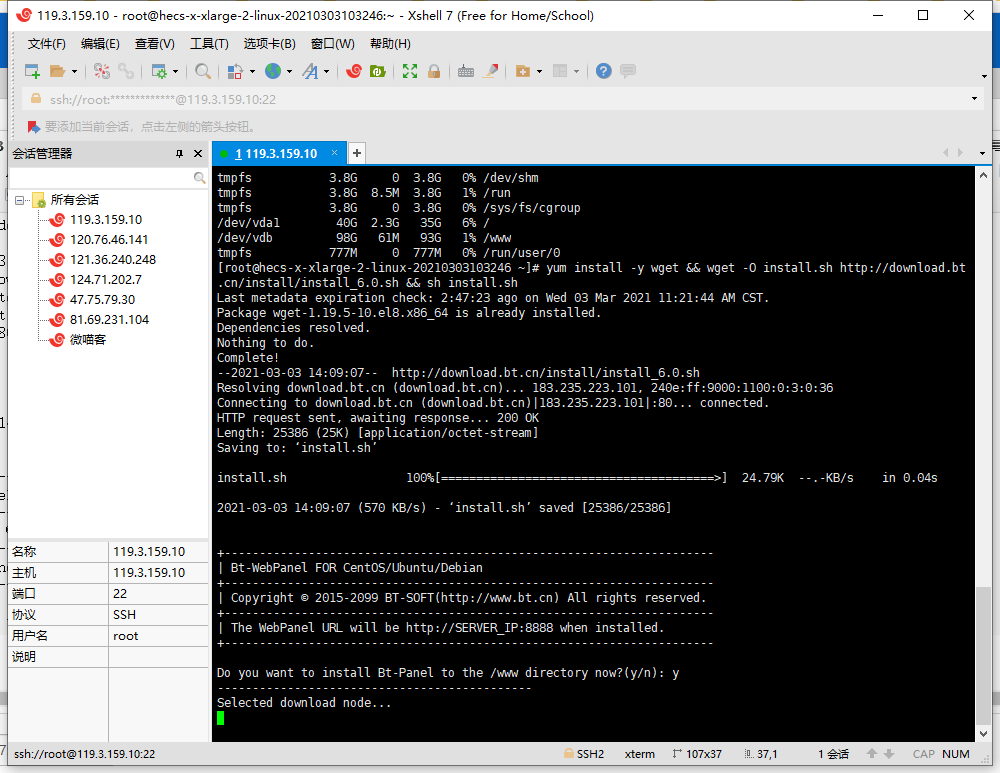
安装时间长短,取决于服务器配置和带宽,如果服务器配置和带宽较好,安装2分钟左右,服务器和配置一般话,安装大概需要5分左右。
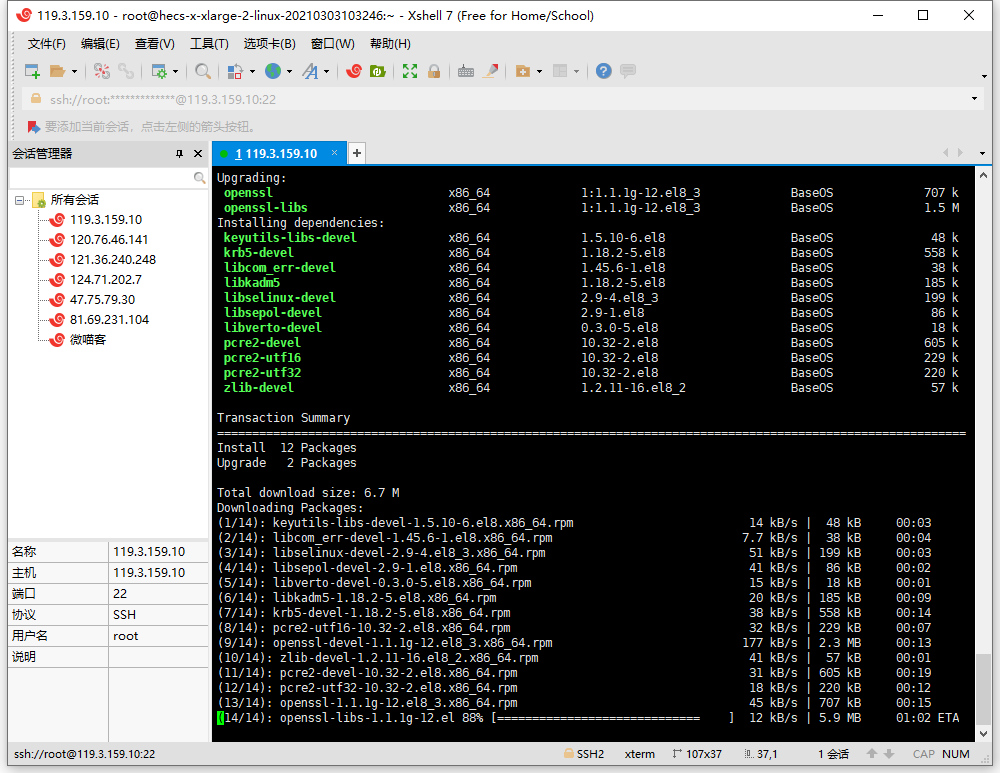
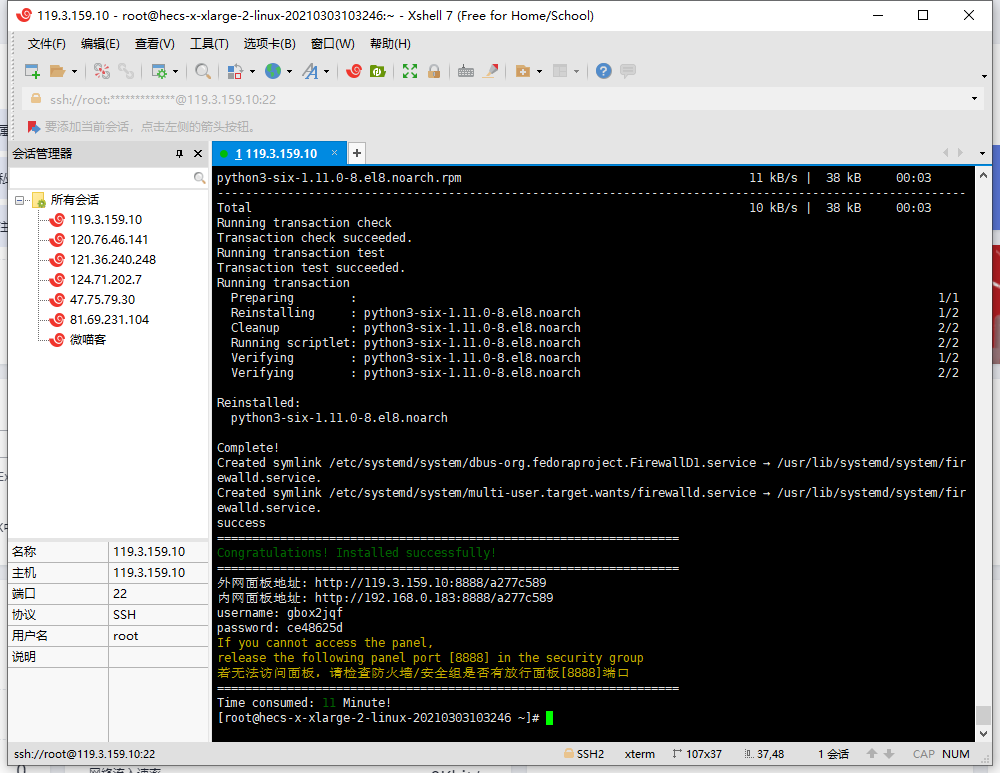
面板安装完成后,WEB管理地址输出到控制台
==================================================================
Congratulations! Installed successfully!
==================================================================
外网面板地址: http://119.3.159.10:8888/a277c589
内网面板地址: http://192.168.0.183:8888/a277c589
username: gbox2jqf
password: ce48625d
If you cannot access the panel,
release the following panel port [8888] in the security group
若无法访问面板,请检查防火墙/安全组是否有放行面板[8888]端口
==================================================================
Time consumed: 11 Minute!
[root@hecs-x-xlarge-2-linux-20210303103246 ~]#
服务器放行常用端口,根据自己情况,把常用端口放行。
华为云端口放行方法
https://support.huaweicloud.com/usermanual-ecs/zh-cn_topic_0030878383.html

阿里云端口放行方法
https://help.aliyun.com/document_detail/25471.html
| 端口 | 服务 | 说明 |
|---|---|---|
| 21 | FTP | FTP服务所开放的端口,用于上传、下载文件。 |
| 22 | SSH | SSH端口,用于通过命令行模式或远程连接软件(例如PuTTY、Xshell、SecureCRT等)连接Linux实例。详情请参见使用用户名密码验证连接Linux实例。 |
| 23 | Telnet | Telnet端口,用于Telnet远程登录ECS实例。 |
| 25 | SMTP | SMTP服务所开放的端口,用于发送邮件。 基于安全考虑,ECS实例25端口默认受限,如需解封,请参见TCP 25端口控制台解封申请。 |
| 53 | DNS | 用于域名解析服务器(Domain Name Server,简称DNS)协议。 如果在安全组出方向实行白名单方式,需要放行53端口(UDP协议)才能实现域名解析。 |
| 80 | HTTP | 用于HTTP服务提供访问功能,例如,IIS、Apache、Nginx等服务。 如何排查80端口故障,请参见检查TCP 80端口是否正常工作。 |
| 110 | POP3 | 用于POP3协议,POP3是电子邮件收发的协议。 |
| 143 | IMAP | 用于IMAP(Internet Message Access Protocol)协议,IMAP是用于电子邮件的接收的协议。 |
| 443 | HTTPS | 用于HTTPS服务提供访问功能。HTTPS是一种能提供加密和通过安全端口传输的一种协议。 |
| 1433 | SQL Server | SQL Server的TCP端口,用于供SQL Server对外提供服务。 |
| 1434 | SQL Server | SQL Server的UDP端口,用于返回SQL Server使用了哪个TCP/IP端口。 |
| 1521 | Oracle | Oracle通信端口,ECS实例上部署了Oracle SQL需要放行的端口。 |
| 3306 | MySQL | MySQL数据库对外提供服务的端口。 |
| 3389 | Windows Server Remote Desktop Services | Windows Server Remote Desktop Services(远程桌面服务)端口,可以通过这个端口使用软件连接Windows实例。详情请参见在本地客户端上连接Windows实例。 |
| 8080 | 代理端口 | 同80端口一样,8080端口常用于WWW代理服务,实现网页浏览。如果您使用了8080端口,访问网站或使用代理服务器时,需要在IP地址后面加上:8080。安装Apache Tomcat服务后,默认服务端口为8080。 |
| 137、138、139 | NetBIOS协议 |
|
我来添加一下常用的几个端口
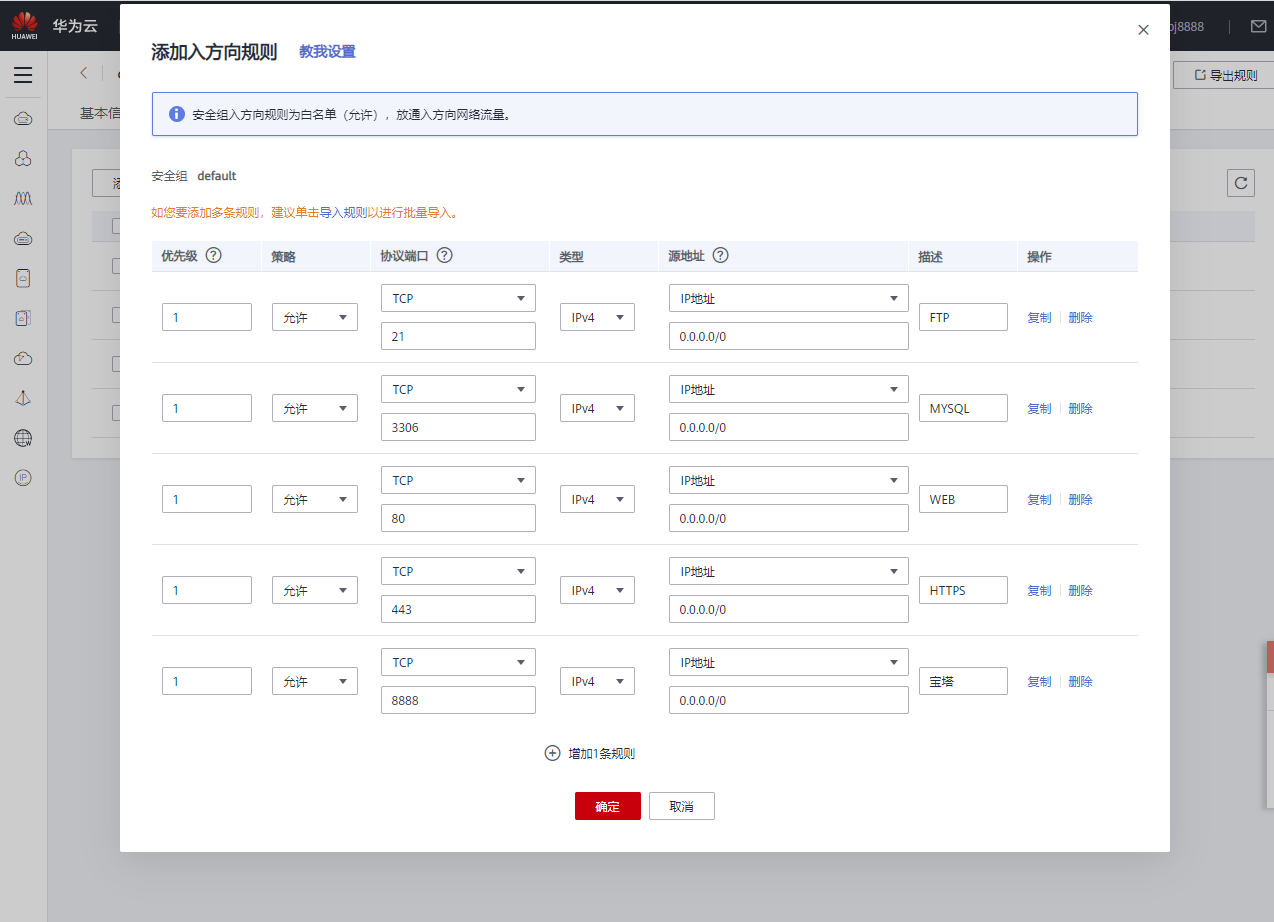
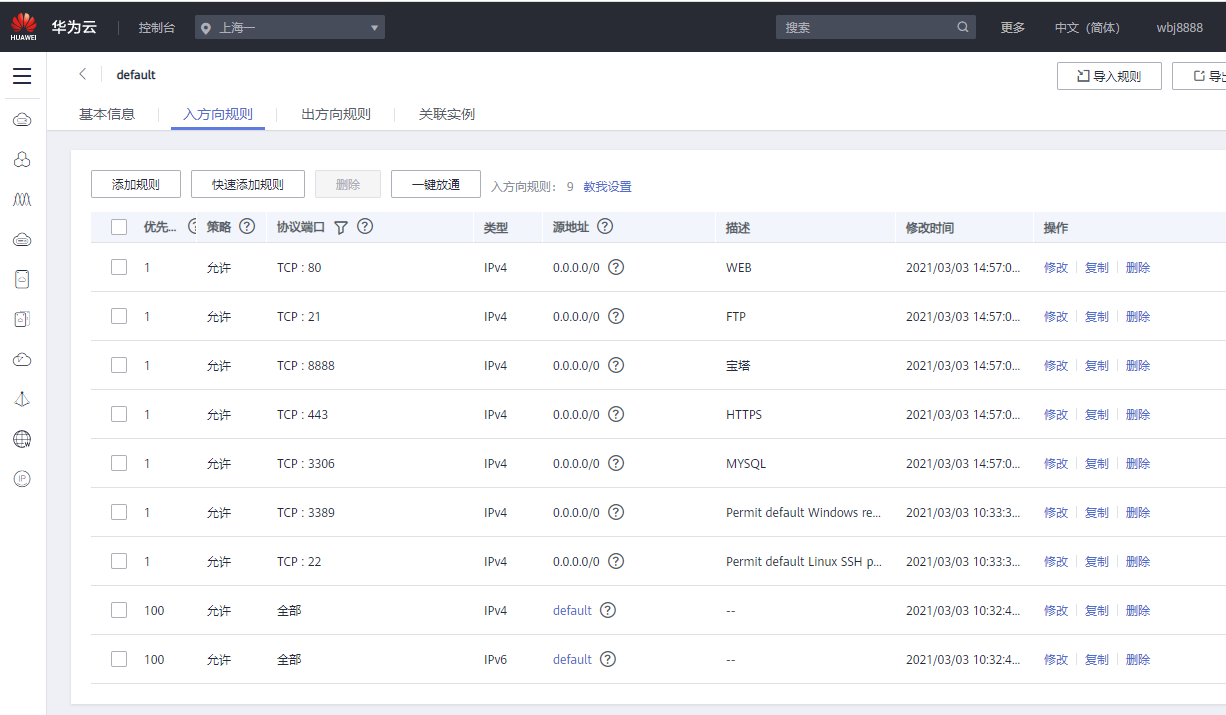
端口添加完成后,我们访问LINUX服务器管理面板。
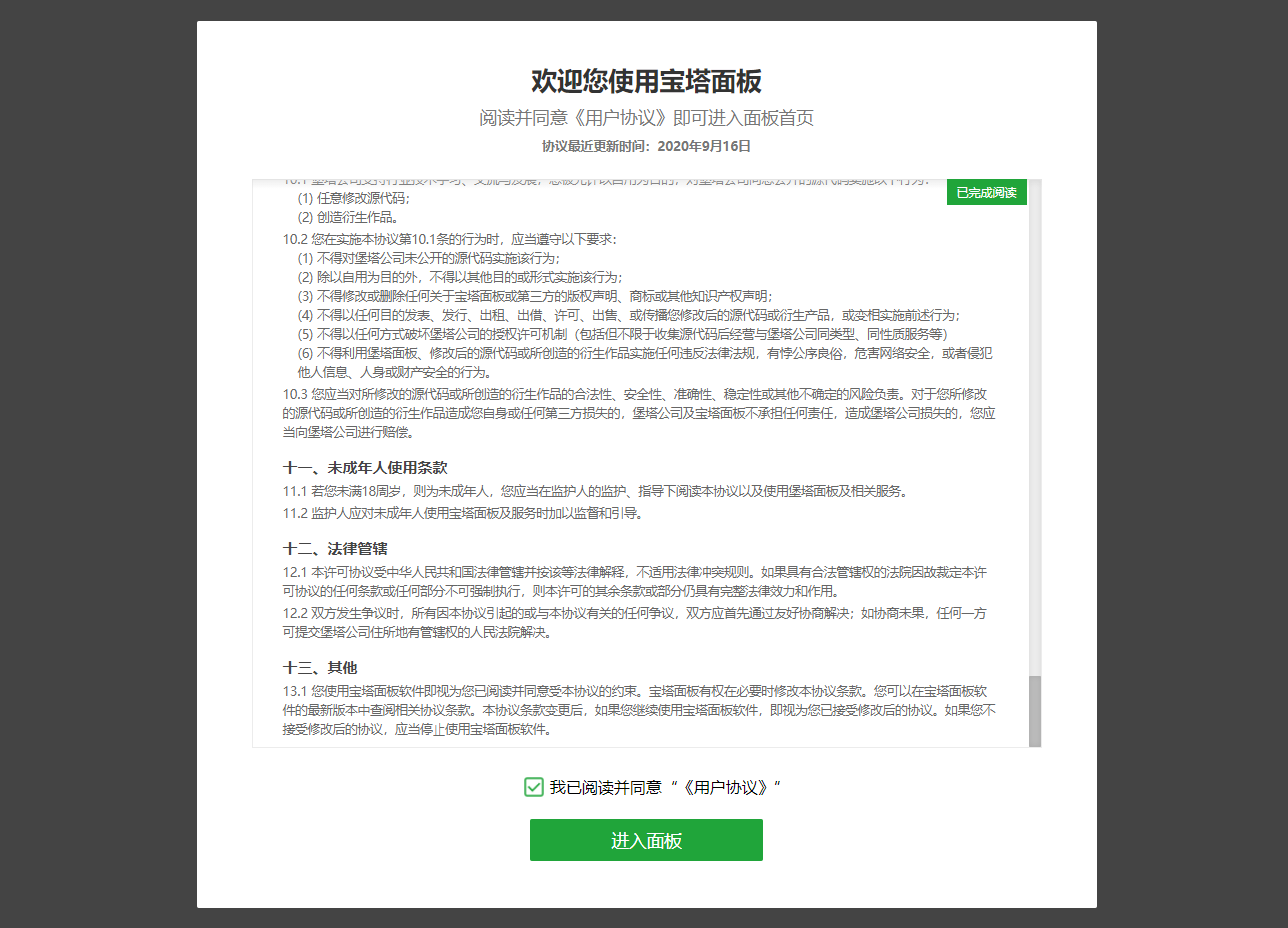
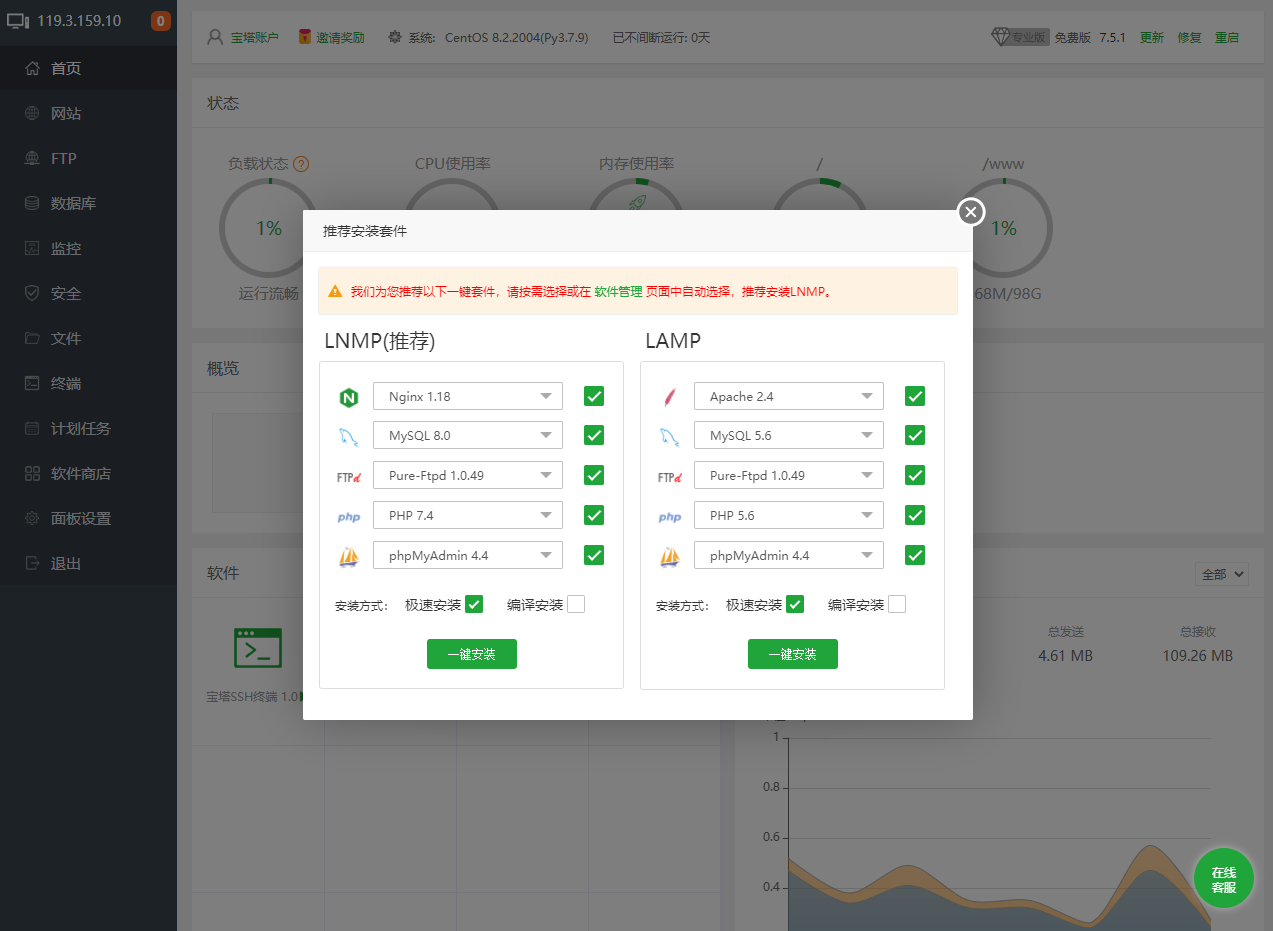
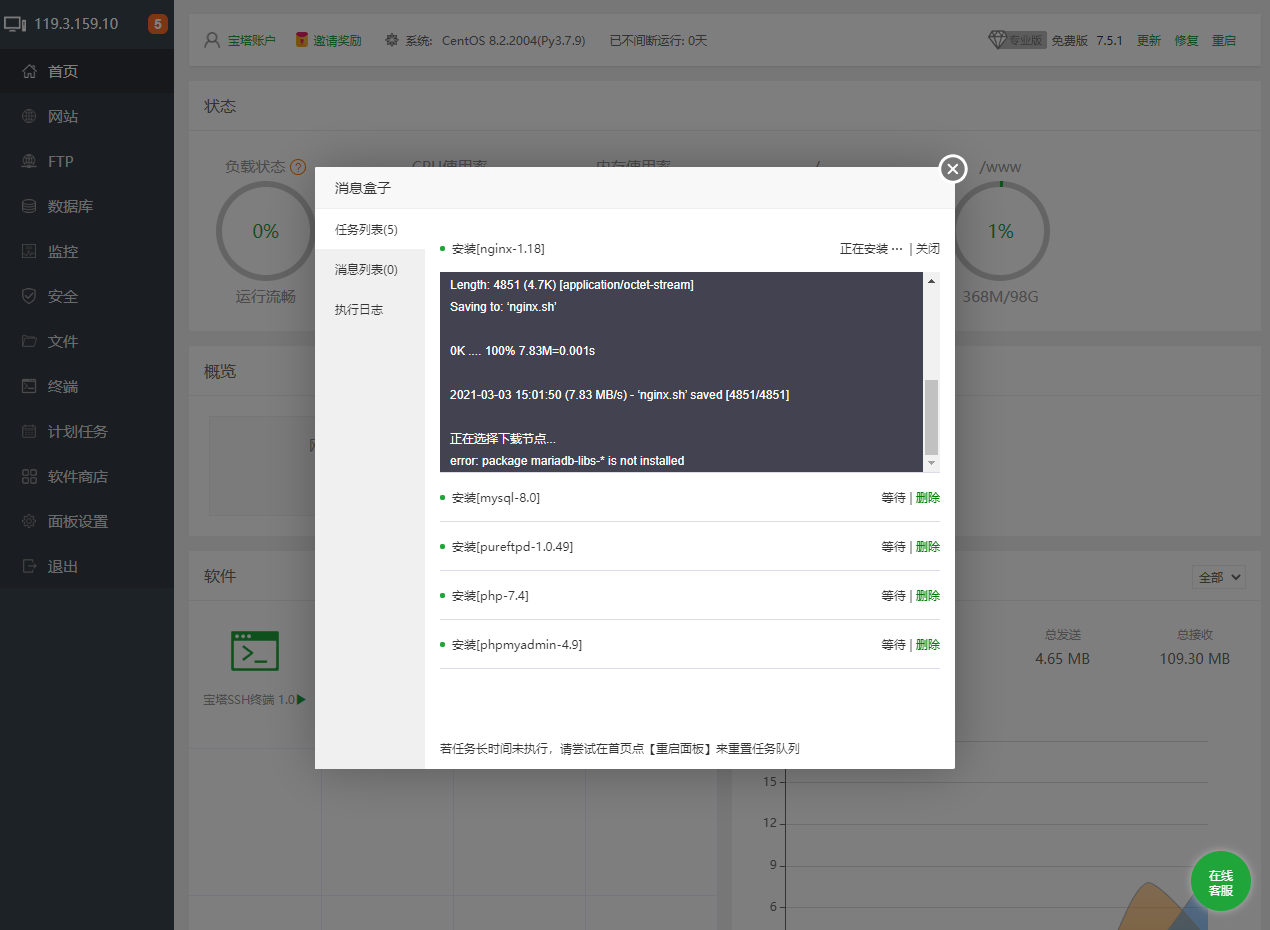
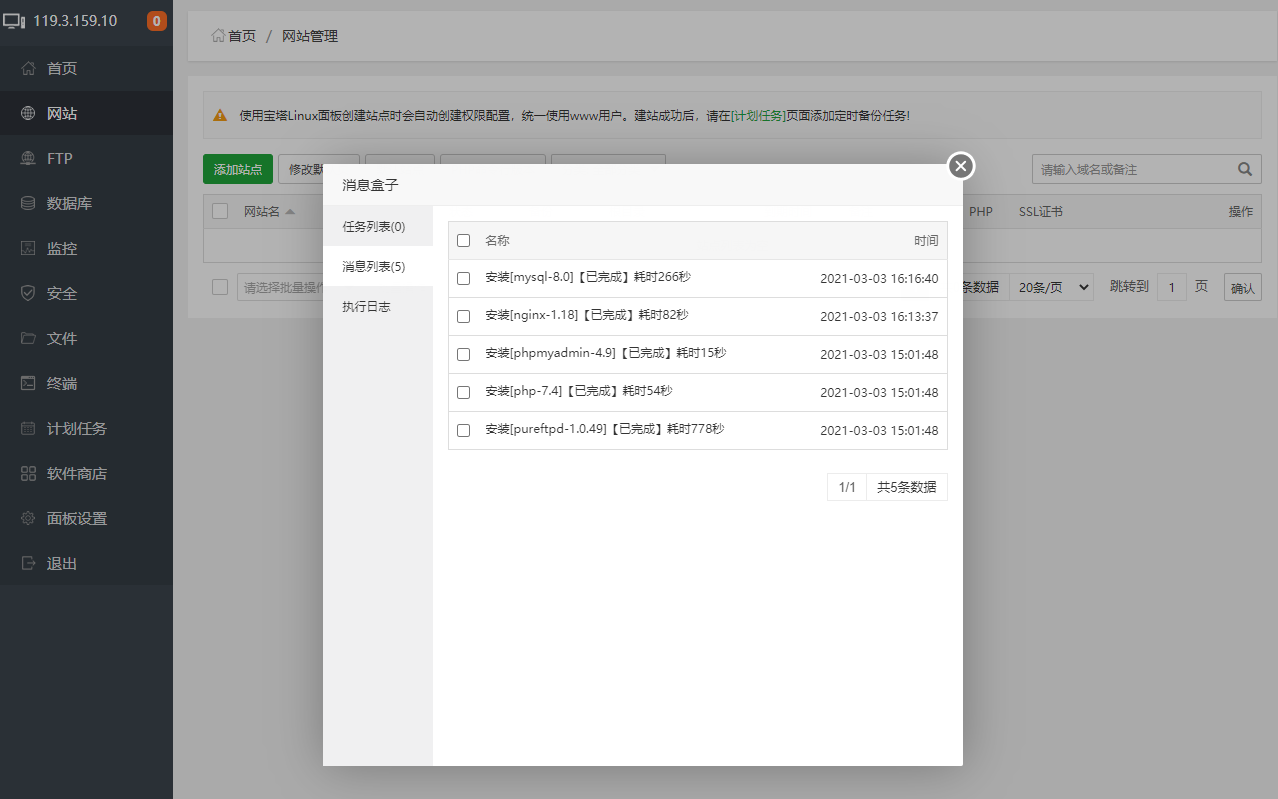
环境安装完成后,我们来创建站点,把系统安装包上传到目录解压。并给目录读写权限。


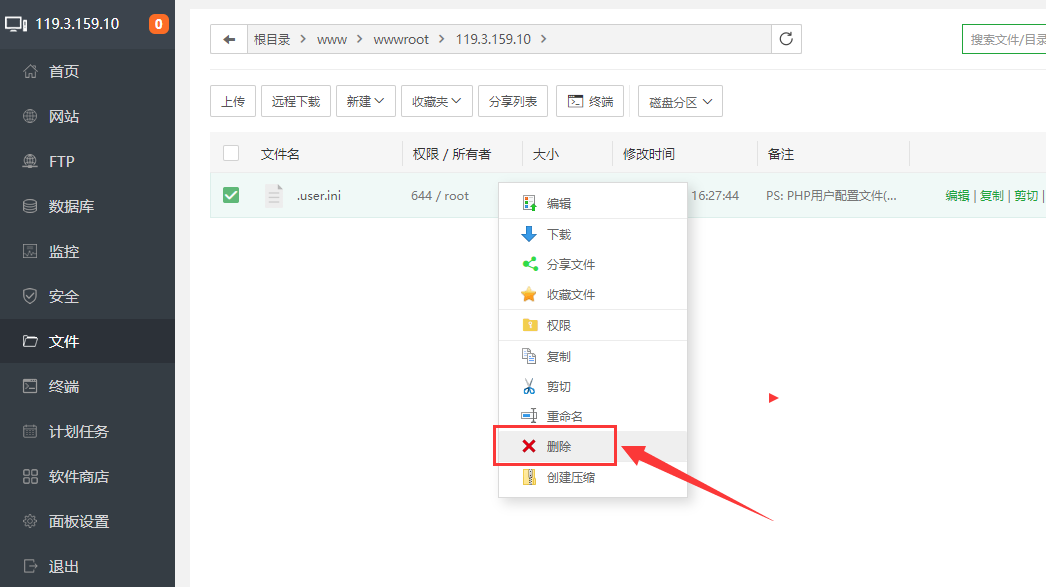
创建完成站点,需要把站点下面文件全删除掉。把系统安装包上传到站点解压。

选择文件,鼠标右键,选择删除。
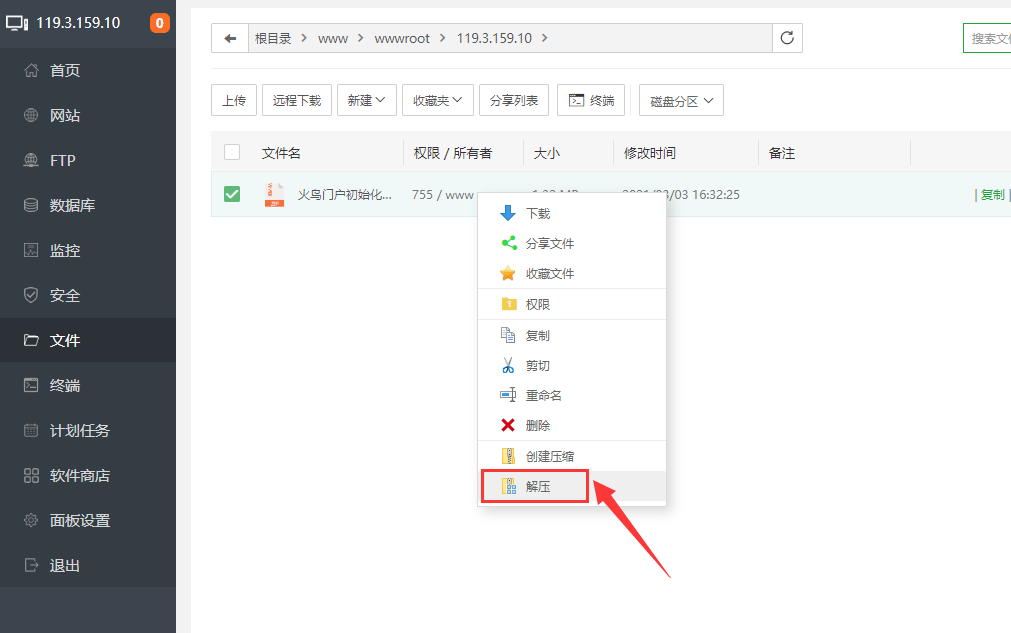
安装包,上传完成后,鼠标右键,选择解压文件。
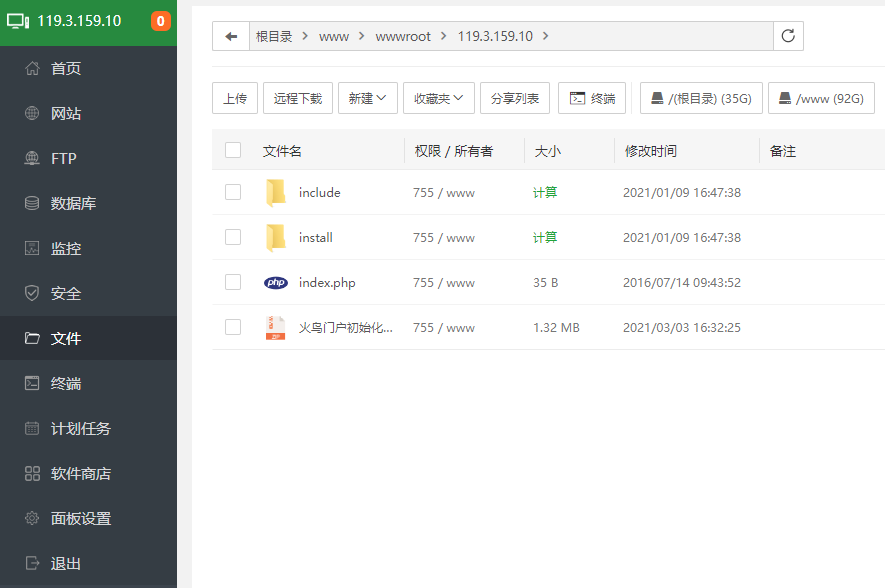
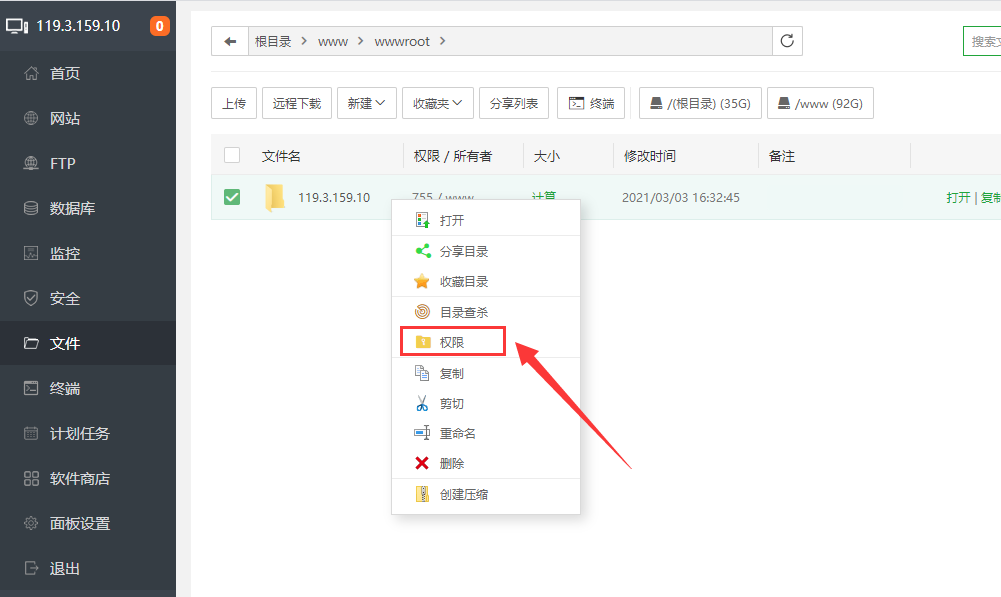
回到上级目录,给这个站点读写权限。选择站点目录,鼠标右键,选择权限,给上777

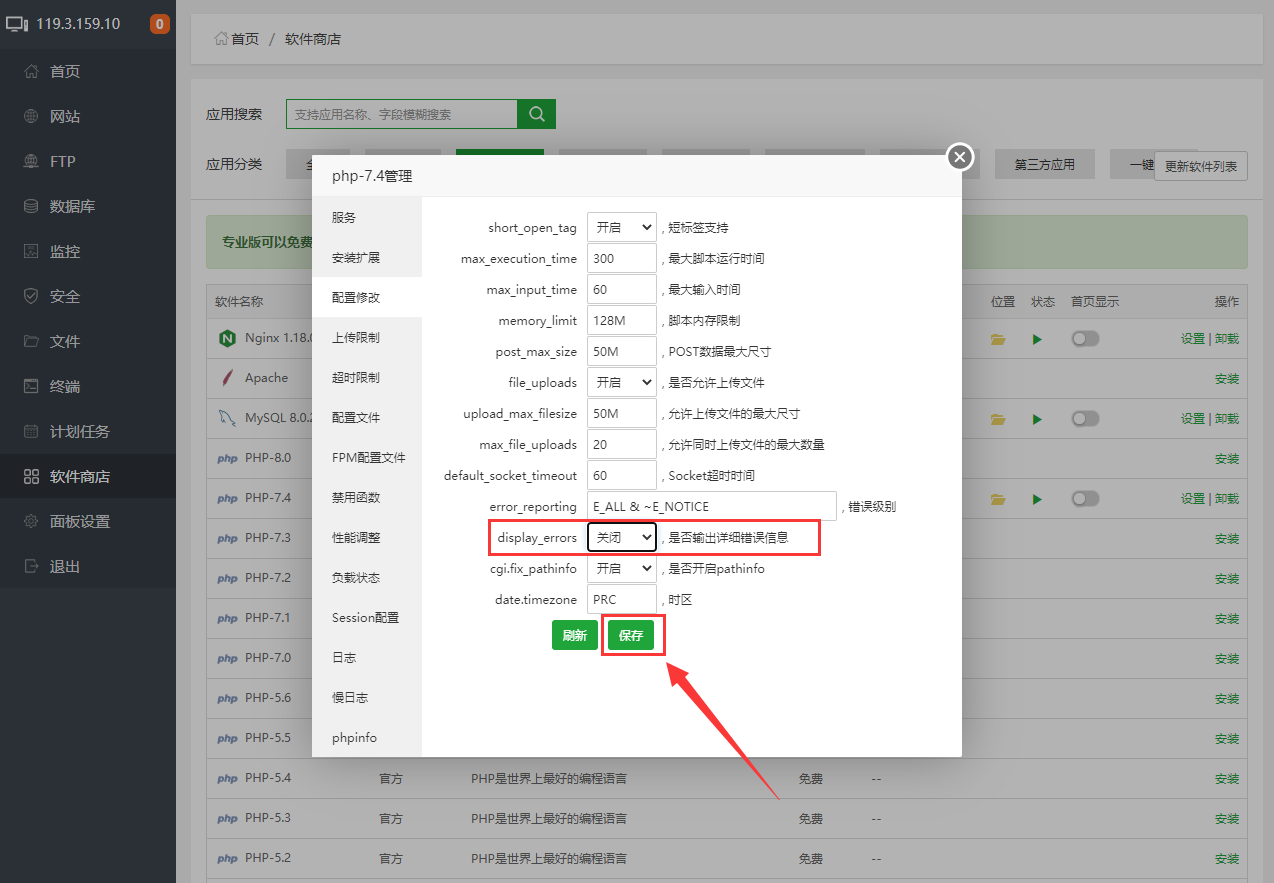
访问站点,如果出现PHP报错信息,需要手动把PHP报错关闭。

在宝塔软商店中,找到运行环境,当前PHP版本进行设置。把报错信息关掉。

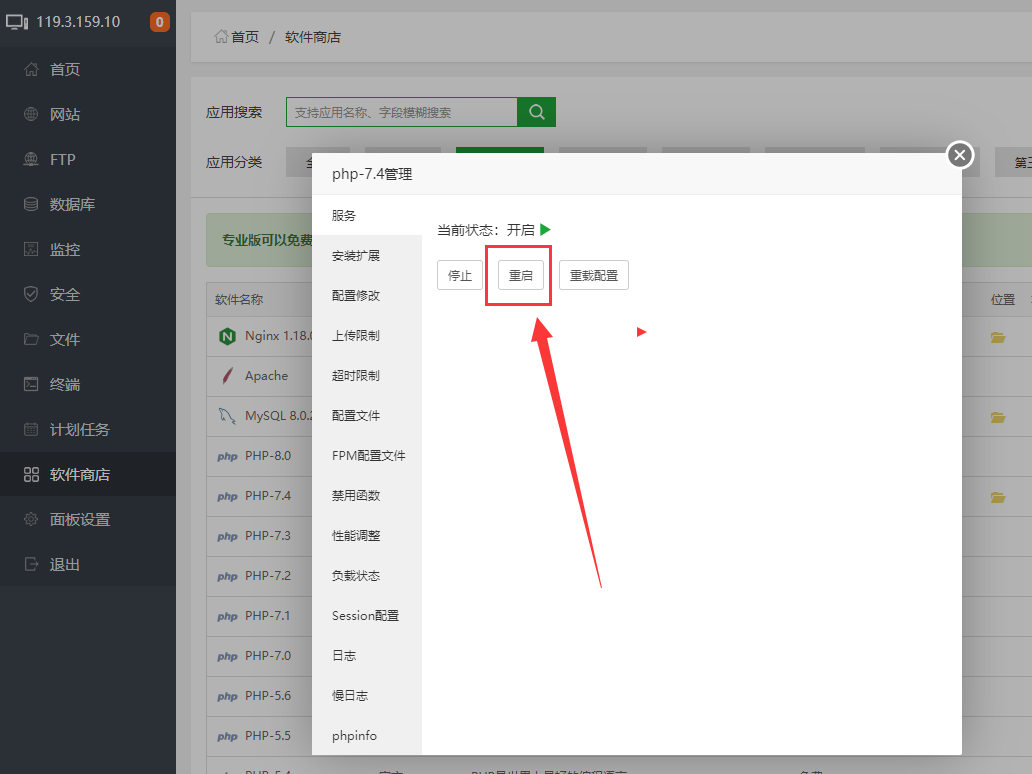
报错信息关掉后,需要重起PHP
重新进入一下网站,继续安装。错误就没有了。
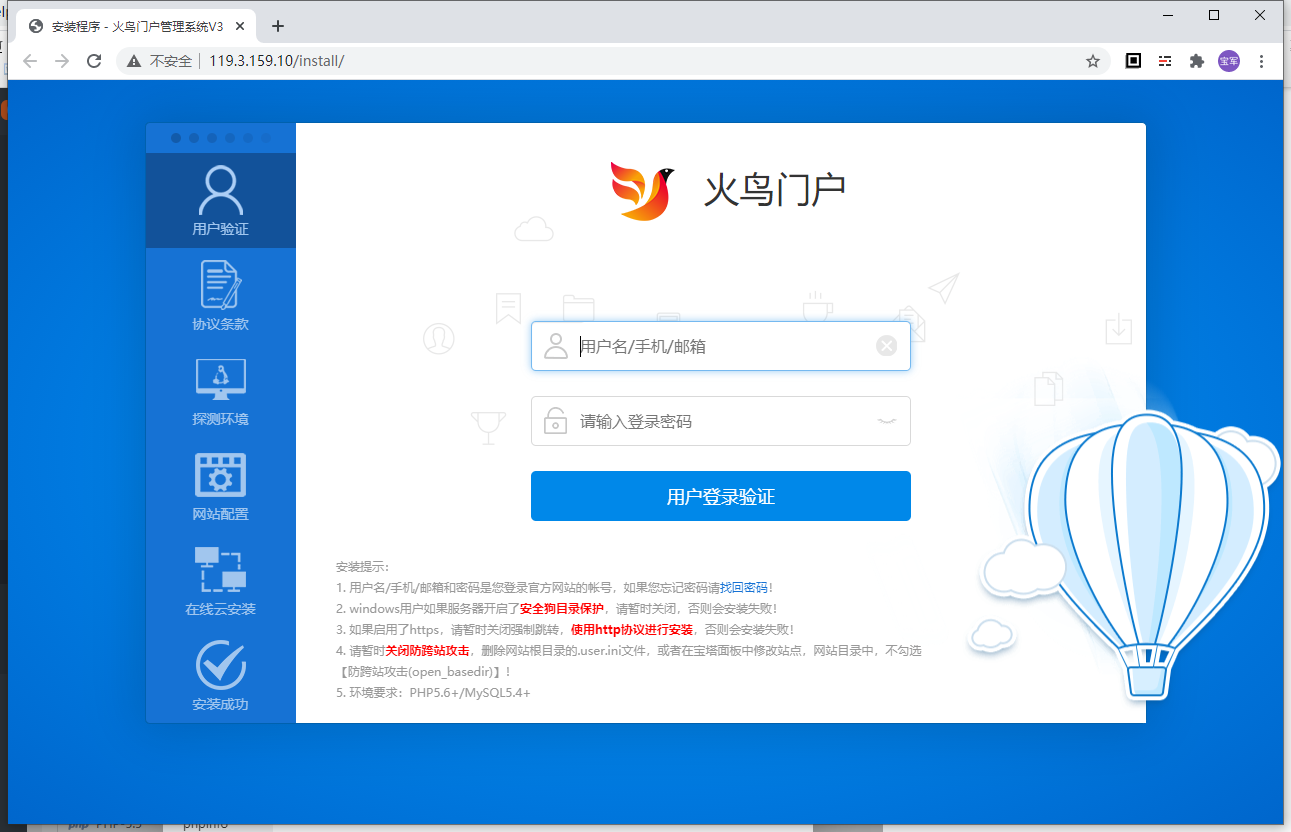
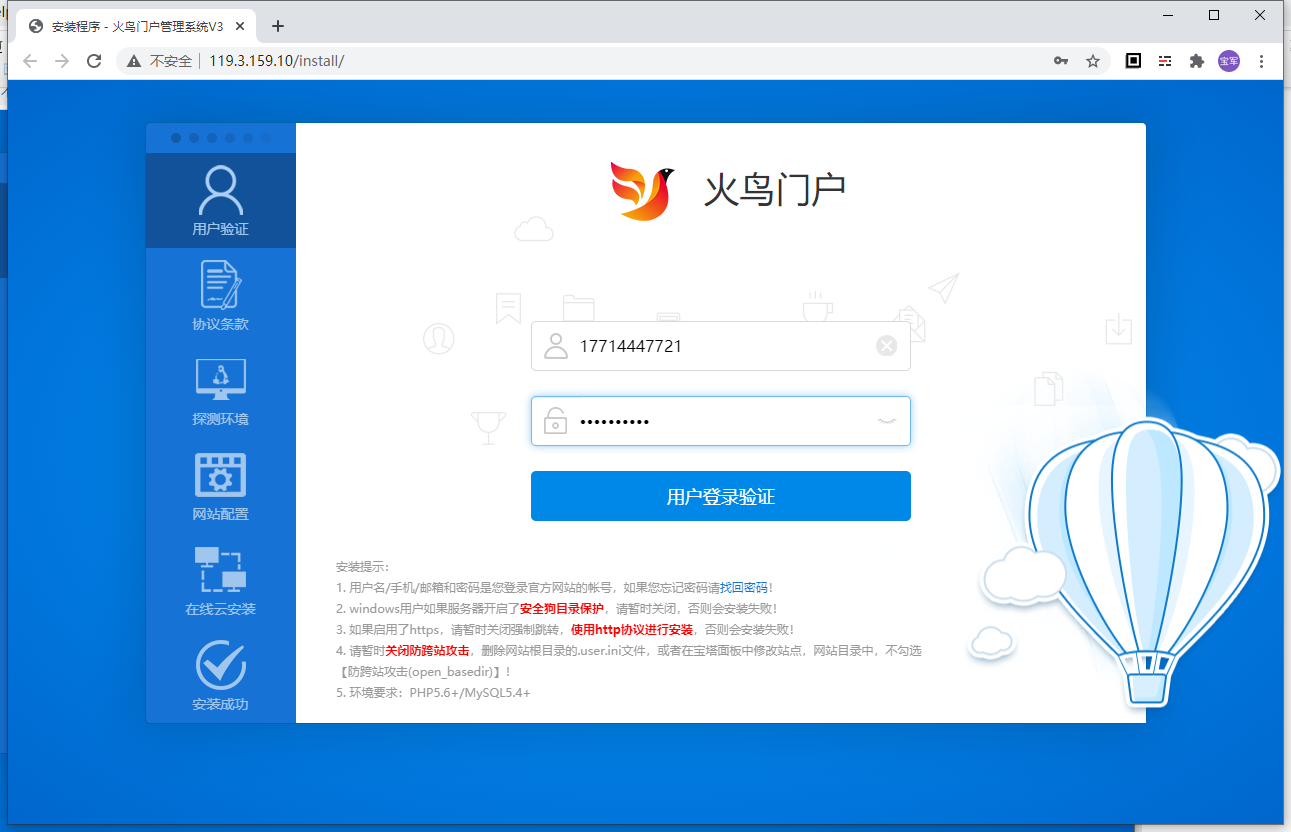
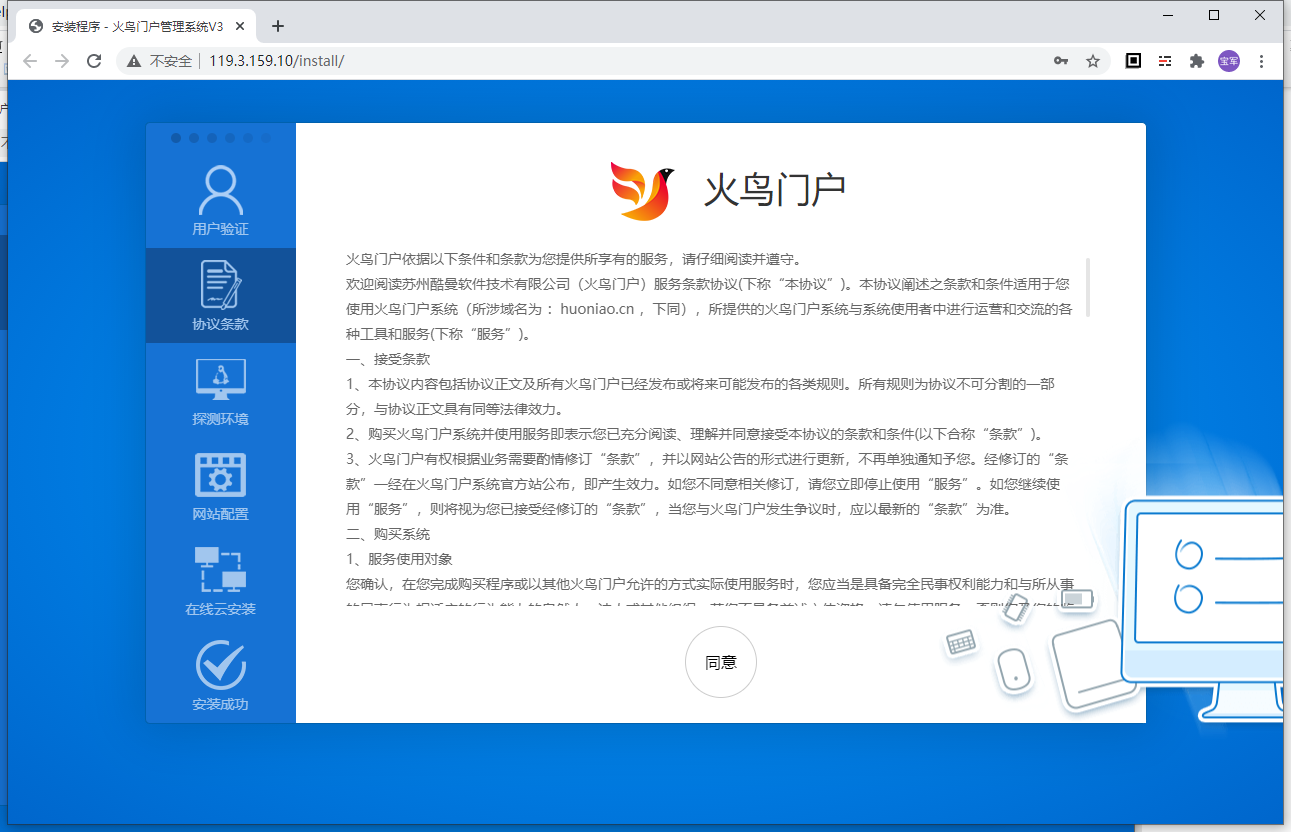
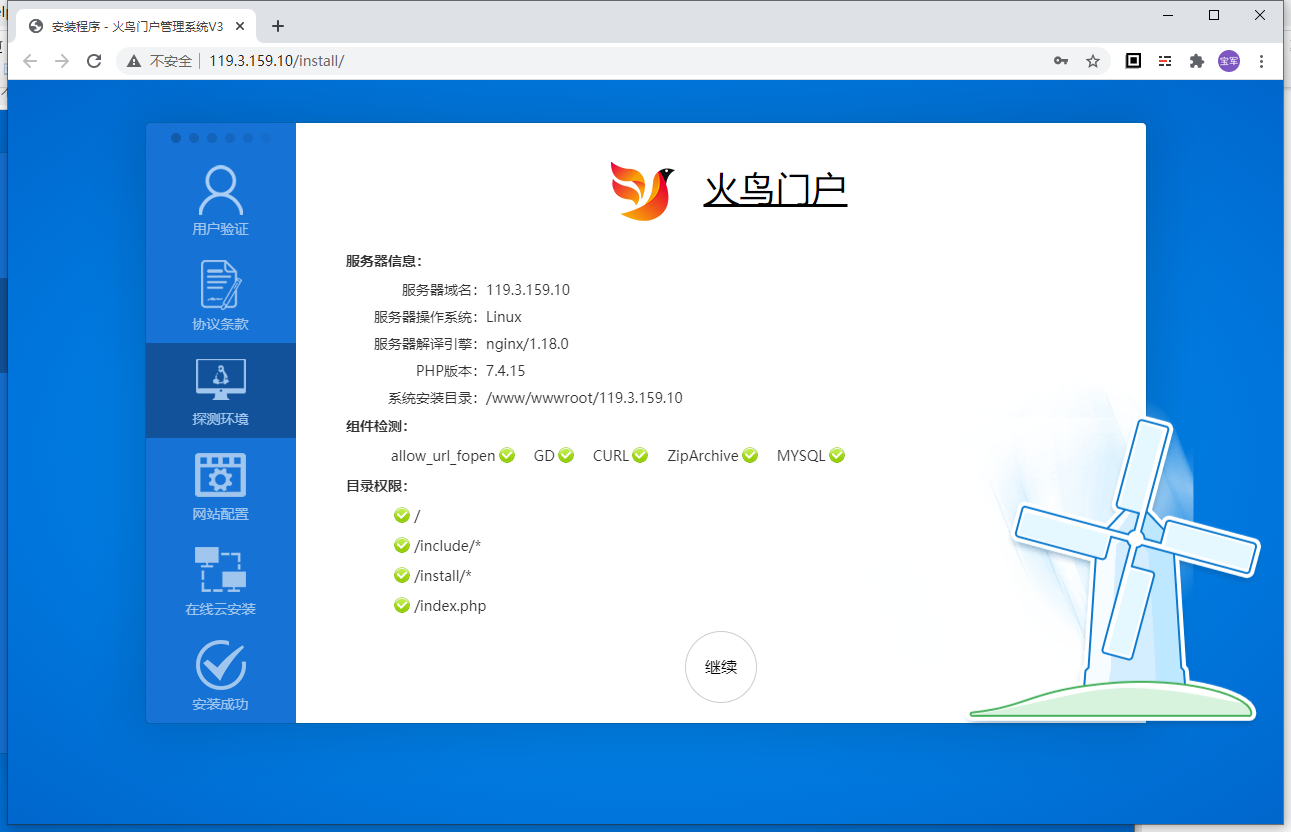
输入官方商店帐户和密码,选择用户登录验证
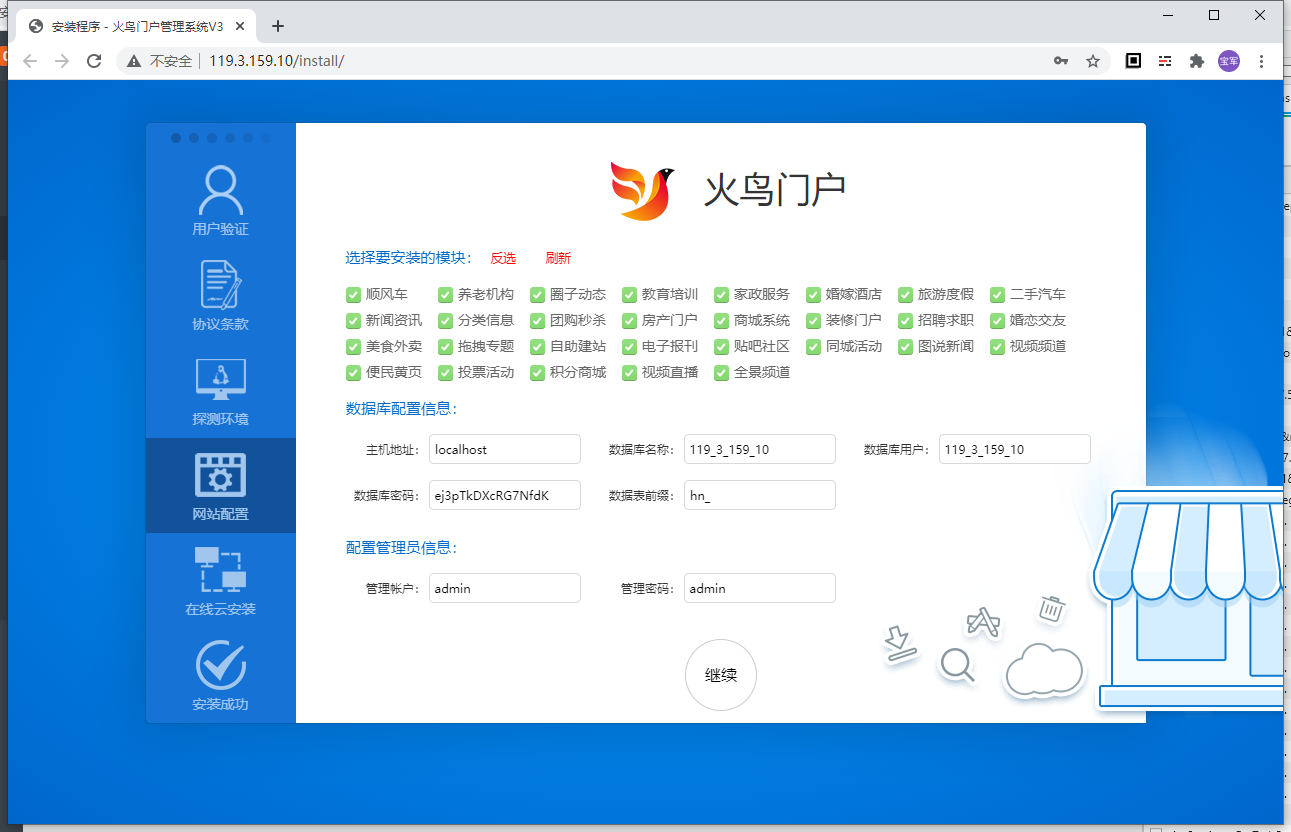
勾选需要安装的模块,输入数据库配置信息及网站后台登录信息。继续安装
